Tuesday, March 12, 2013

Quilt Rescue

I saw an old quilt in my father in laws auto body shop.
He was using this quaint old thing to cover cars overnight.
It's so ugly, it's cute.
 
 
Someone pieced these various scraps
of fabric and did some unique stitching.


There's even a little Christmas fabric!
 
It's not in the best shape.
But when folded up, it's adorable.


I love this shabby quilt.


Friday, March 8, 2013

Jumbled Numbers

How do you like my latest roadside rescue project?
 
 
Yeah.  It was free.
 
Free
solid
and
oh so huge!
 
It took some TSP (heavy duty cleaner)
and muscle to get the sticky grime off.
 
I did two coats of Annie Sloan's Olive Chalk paint.
 
Then the fun began!
 
Using my Cricut, I cut various sized vinyl number stencils.
I taped the lines on top that can be seen in the original wood.
It made for a quick easy tape job!!!


I painted over my stencils with some flat black paint.
 

Next I waxed all the sides of it, and a bit around the top edges.
 
On these doors... you can see one I did and the other unwaxed.
Does it look older?
 
 
Now...
 
Here it is, all done!


Thanks for stopping by my blog to see this project!
 
Linking up to:


Thursday, February 28, 2013

Spring Umbrella

I'm a copy cat.
This spring umbrella is an idea
from Midwest Living (April 2010) magazine.
I keep good magazines FOREVER!

 
It just so happens that I had a vintage child's umbrella.
All I did was put a handful of pillow stuffing
way down inside to make the umbrella
 appear "full" of flowers.
Then I stuck a few various flowers
 from Michaels in the umbrella "pockets".
I tied a ribbon around the middle.


Even though it's a red umbrella,
it worked for spring  by adding the yellow.
 
Here are a few other spring umbrellas:


Hopefully you're getting spring fever.
I know I am!
I start my greenhouse job next week,
which is always a bittersweet event.
 
Linkin up to:
&


Thursday, February 21, 2013

Heart Side Table

I've learned some valuable advice from
Secondhand Treasures.
It was a magazine with tips from American Pickers.
 
*Never throw out a price, always allow the seller to start
the price range.
 
It's so true!
I was shopping at a thrift store. 
I knew this seller was flexible.
When I spotted this side table,
I wanted to offer $10.
Instead, I asked "what do you want for this?"
He, like always, points out the obvious qualities.
$8
I didn't even argue!
Very rarely do you find a piece:
1. perfectly solid
2. smooth,
paint ready wood
(no sanding/stripping)
3. cute as can be!
 
BEFORE:
 
STEP ONE:
paint one thin, shabby coat of paint
See how it's streaky?  I like that!
Next: to cover that stain on the top level.
See the giant ring?
 
STEP TWO:
adhesive vinyl stencil
(layer one)
blue tape edges
 
(Should have centered it, oops.  Oh well)
 
painted white
let dry
covered white painted diamonds with more vinyl
 
STEP THREE:
paint black
peel off diamond vinyl covering white
 
STEP FOUR:
add Tim Hotlz brand number plaque
add long black vinyl strip on front by legs
notice the lovely streaking here on lower level?
 
 
AFTER:
 
Pretty sassy, right?
 
 
Linking up to:


Monday, February 18, 2013

Old Toaster

I was feeling disappointed in my judgement.
Purchasing this $3 toaster was not my smartest move.
Then the idea hit me.
 
It's shaped like a birdhouse!
 
So I drilled pulled the toaster "guts" out with a pliers.
That left the inside open for a nesting area.
 
Then I drilled a hole in one side,
which was a bit challenging.
 
 
Then I found a decorative ring in my jewelry making supplies.
I wanted the opening to be safe the birds,
since my drilled hole was pretty sharp.
 
 
I was sure to drill the hole on the side with the cord plug in prongs.
They'll make a perfect little landing perch.
 
 
I wired the ring in, which then required the side doors
notched out so they closed tightly where the wire is.
 
I wired the back shut.
You can still use pliers to unhook it & clean out old nests.


Linking up to:
&


Friday, February 15, 2013

Forgotten Secret

It took me a while to find a suitable dresser for my first big "redo".
 
 
$20, no fancy spindles
 
just a basic, operational old dresser
 
it came with the rusty casters and one glass knob inside
 
and a remnant of it's past life on the front
 
 
also inside..
 
a wallpaper tag
 
 "LOCAL" tag
 
and wedged in the very back was a cool bottle opener
 
 
Next we have my amateur refinishing process...


Instead of playing it safe with a neutral, I chose MEGA color.
 
It's called Forgotten Secret.

 
Drab to Fab, right?
 
I spent some time sifting through Pintrest paint designs.
The drawers were done using a adhesive vinyl stencil from my Cricut.
I spray painted the white for a perfect even coat.
Blue tape made a perfect with for keeping my design square & spaced right on all the drawers


I bought some new hardware for it.
Some required large washers to keep the screws from pulling through the wood.
 
I completed this project last summer,
as you can tell from the photographs.
Thanks for looking.
~Jane
 
 
Linking up to:


Sunday, February 10, 2013

Empty Frames

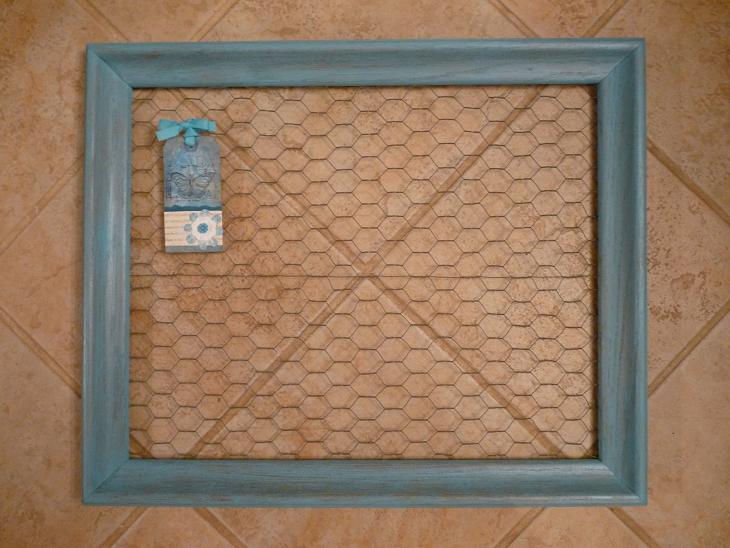
I've been on a chicken wire clipboard kick.
So a recent visit to the second hand store got me 3 frames.
  I'll share them with you and you'll see the transformations!
 
Before:
$2.50 large, $1.50 small
 
After:
this is the large one
 
this is the small one
 
Here is another one, and I almost didn't get it because it's plastic!
I talked the seller down to $3, he was asking $5.
 
Before:
 
After:
 
Isn't it fancy?
The best part is that it's super lightweight!
 
 Linking up to:
<br><br><br><b>Join us every Friday...</b>
&
The Shabby Nest