Hi folks.
I'm excited to share a cool desk transformation
with you. I forgot to get a "before" picture.
But as you can imagine, it was your typical
dark brown wooden desk.
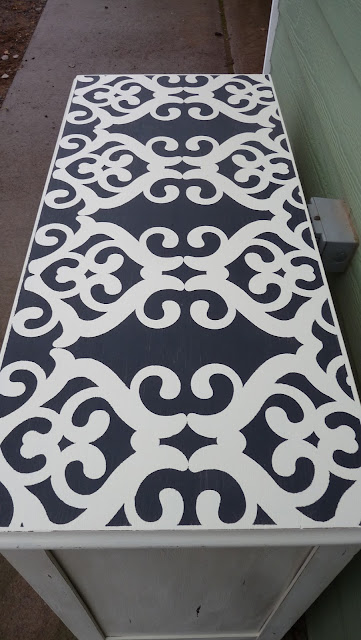
Here is the updated piece...
This was a ready to paint, sturdy desk.
It had minimal varnish & since I planned on
distressing the edges, I did no sanding at all!
I chose not to prime either.
In my opinion,
skipping these steps should
only happen if you:
Use Annie Sloan Paint
or
Plan on a very distressed look
Clean well with TSP
Apply a super thin base layer
Give the first layer ample dry time
It had great hardware,
which can make or break
your furniture sale.
These were intricate,
fine & had a great patina!
The top got a fancy stencil design.
I made it using my Cricut machine &
adhesive vinyl.
It's a messy, tedious process. But in the
end it is very much worth the time.
I've gotten pretty fast at it!
Sometimes choosing the design can be tricky.
For creative stencils,
the biggest trick is to
make sure your base layers of paint
are good & dry. Otherwise, when you pull
your tape & stencils off the paint will
peel right off with it.
I don't apply much pressure to the
tape either.
Now the honest breakdown...
paint brand: Valspar
desk cost: $5
selling price: $80
After cleaning,
3 coats of paint,
stencil time,
& distress sanding:
about 3-4 hours of work
Now, I am already moving
on to my next project!
Linking up to:
and


No comments:
Post a Comment